 Visual Enhancer
Presets, Models & Settings
Visual Enhancer separates workflow configurations (Presets), downloadable weights and runtimes (Models), and machine-specific hardware choices (Settings).
Presets (.json)
Section titled “Presets (.json)”Use the Presets menu in the header bar to save and reload complete workflow setups:
- Export Preset: Saves active Image and Video pipeline card orders, toggles, parameters, ReShade overrides, 3D LUT adjustments, and export settings to a
.jsonfile (up to1 MiB,1–120character preset name). Per-session paint mask buffers are omitted so presets remain compact and portable. - Import Preset: Disabled while a render is running (
Idlerequired). Importing validates types, ranges, stage-order rules, and filename suffixes before applying settings—showing a non-blocking banner confirmation or validation error.
Models & NeuroFrame Runtime
Section titled “Models & NeuroFrame Runtime”Click Models in the header bar to open the model library dialog. Core NVIDIA RTX/DLSS features, ReShade, LUT grading, scaling, and format conversion do not require downloads; AI cleanup, AI upscaling, and ReShade AI depth install on demand into %LOCALAPPDATA%\Merserk\Visual Enhancer\Models (or VE_MODELS_DIRECTORY).
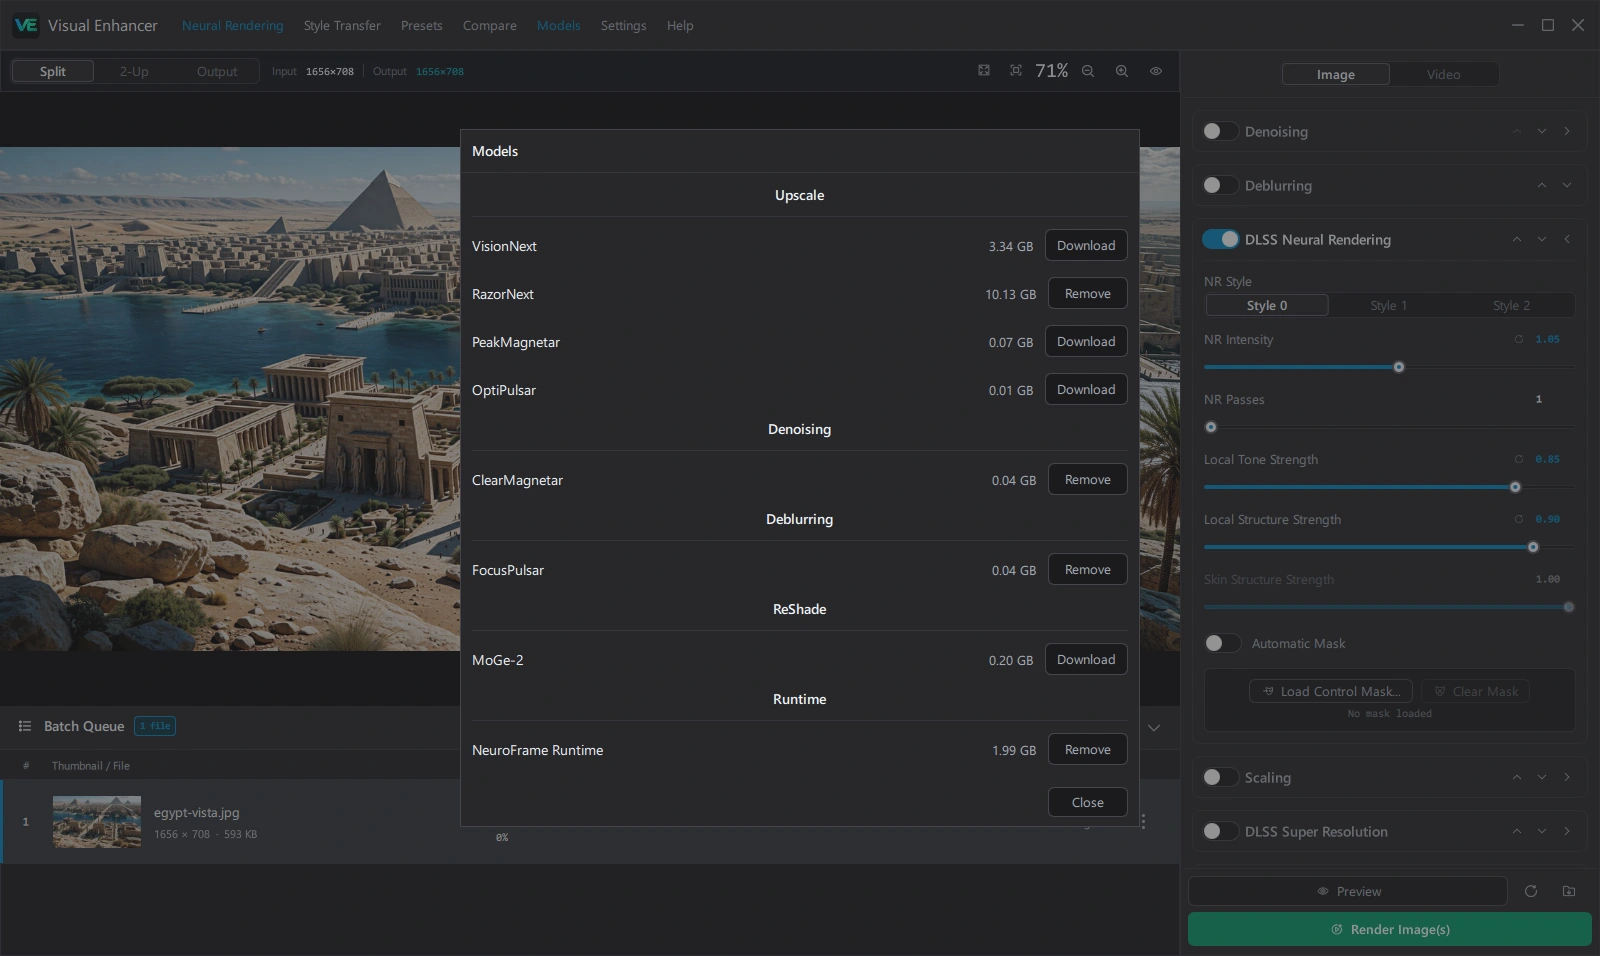
| Category | Package | Used By |
|---|---|---|
| Upscale | VisionNext |
Image & Video Upscale stage |
| Upscale | RazorNext |
Image & Video Upscale stage (high-detail reconstruction with VRAM budget control) |
| Upscale | PeakMagnetar |
Image (1x, 2x, 4x, 6x, 8x) & Video (2x, 4x / Target Resolution) Upscale stage |
| Upscale | OptiPulsar |
Fast Image (1x, 2x, 4x, 6x, 8x) & Video (2x, 4x / Target Resolution) Upscale stage |
| Denoising | ClearMagnetar |
Denoising stage (with optional Noise Adaptation) |
| Deblurring | FocusPulsar |
Deblurring stage |
| ReShade | MoGe-2 (moge-2-vitb) |
ReShade AI Depth / Auto depth estimation (ONNX Runtime DirectML) |
| Runtime | NeuroFrame Runtime |
Execution runtime (CUDA, XPU, or ROCm / HIP) required by PyTorch AI models (ClearMagnetar, FocusPulsar, VisionNext, RazorNext, PeakMagnetar, OptiPulsar) |
Online Downloads & Resume
Section titled “Online Downloads & Resume”- Clicking Download on any PyTorch model automatically queues NeuroFrame Runtime first if the matching backend (
CUDA,XPU, orROCm / HIP) is not yet installed. - Downloads run in chunks with SHA-256 verification and automatic resume markers (
.part/.resume.json), so interrupted transfers show a Resume button. - A live progress bar appears directly under the Models header tab while transfers are active. Remove prompts for confirmation and is disabled while a model is actively loaded by a render.
Offline Model Library Setup
Section titled “Offline Model Library Setup”- Extract or copy your offline
Modelsbundle (containingmodels-manifest.json, model folders, and optionallyneuroframe-runtime) to%LOCALAPPDATA%\Merserk\Visual Enhancer\Models—or store it on any drive and set theVE_MODELS_DIRECTORYenvironment variable. - Launch
Visual Enhancer.exeorVE_CLI.exe. Startup automatically verifies and migrates compatible offline layouts.
Settings (Preferences & System Configuration)
Section titled “Settings (Preferences & System Configuration)”Open Settings from the header bar to configure global preferences stored per user:
Language
Section titled “Language”- Interface Language: Switch dynamically between 12 UI localizations (
English (US),العربية,Deutsch,Español,Français,हिन्दी,日本語,한국어,Polski,Українська,中文 (简体),中文 (繁體)).
Hardware & GPU Acceleration
Section titled “Hardware & GPU Acceleration”- AI Processing GPU (Tensor Cores / NGX): Select
Autoor a specific NVIDIA GPU for DLSS Neural Rendering, DLSS Super Resolution, DLSS Ray Reconstruction, DLSS Frame Generation, RTX Video Super Resolution, RTX Video HDR, NVIDIA VFX, and ReShade CUDA interop. - AI Processing GPU (DirectX 12 / FidelityFX): Select
Autoor a DXGI GPU adapter for AMD FSR 3 Frame Generation. - Decoding / Encoding Device: Choose
Auto,CPU (Software decoding / encoding), or a Vulkan device adapter for FFmpeg decode/encode and GPU pixel filtering.
Upscale
Section titled “Upscale”- GPU: Select
Autoor a specific DXGI adapter for AI upscalers. - AI Inferencing Framework: Choose
Auto,CUDA,XPU, orROCm / HIPfor NeuroFrame Runtime execution.
Preview
Section titled “Preview”- Realtime Preview: Toggles automatic preview re-evaluation when you adjust sliders or scrub the video timeline. Disable this on slower machines and trigger previews manually with the Preview button.
- Where to set Video Preview Length: In Video mode on Neural Rendering, use the duration selector (
1 s,3 s,5 s,10 s,20 s,30 s) directly beside Preview in the bottom inspector footer. - Where to configure ReShade search folders: Inside the ReShade pipeline card, set semicolon-separated (
;) Shader Search Folder (.fx / .fxh) and Texture & LUT Search Folder paths.
Processing Cache & Maintenance
Section titled “Processing Cache & Maintenance”- Clean Cache: Displays current temporary preview and clip cache footprint on disk and reclaims all unreferenced cache files while keeping files currently loaded in viewports or queues untouched. Disabled while renders, previews, or LUT analyses are active.
- Open Logs: Opens
<app-folder>\logs\in File Explorer for troubleshooting diagnostics. - Reset All Settings to Defaults: Restores every pipeline setting and clears active control masks after a confirmation prompt.